The Saradomin Strikes campaign settles during the God Wars period, where Saradomin tries to claim the Misthalin and Asgarnia kingdoms from Guthixian, Zamorakian and Zarosian forces.
The campaign begins in Deus Ex.
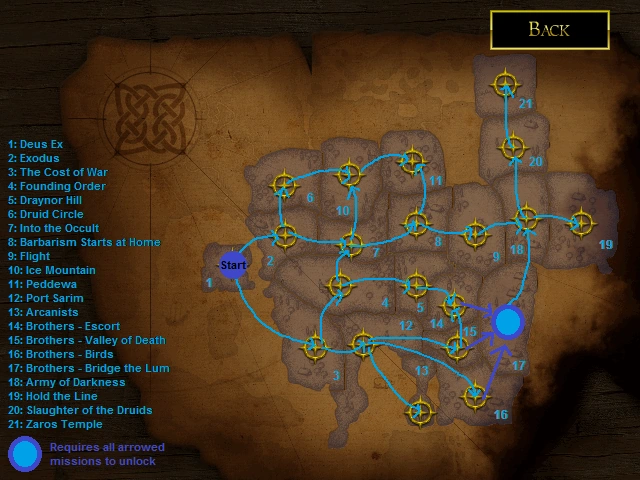
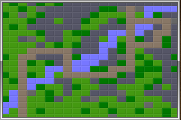
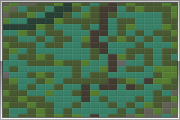
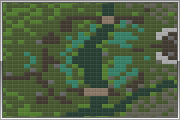
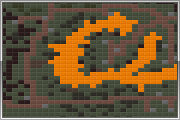
The Saradomin Strikes's map interface, from where you can choose missions.
Tactics
Units
Strength & HP of units listed, and tips to using them.
Monk- early priest; decent against low-level and low HP opponents. Heals 3 HP to adjacent friendly units and can increase strength by burying bones on its tile. Strength: 10, Class: Healer, Speed: 6
Paladin- early knight; low-level warrior capable of one-hitting goblins and two can take out low-level healers (necromancers, druids, goblin priests) and low-level warriors (werewolves, etc.) while almost killing Zamorak/Zaros rangers. Strength: 10, Class: Warrior, Speed: 6
Saradomin Owl- low-level and weak flyer that can blockade enemy units; easily leveled up on enemy barbarians and goblins. Easily killed by Bandosian hobgoblins, Zamorakian/Zarosian mages and rangers, and dwarf cannons. Strength: 5, Class: Flyer, Speed: 6
Saradomin Ranger- primary archer for Saradomin, useful in taking down enemy mages and flyers, and decent against skirmishers; Stregth: 20, Class: Ranged, Speed: 6
White Knight- heavy infantry unit, useful against archers and skirmishers and can stand up against stronger Bandosian units. Strength: 25, Class: Warrior, Speed: 5
Saradomin Mage- powerful unit against warriors, crippling if not killing them; common strategy is to have a white knight, ranger, and mage stacked for "maximum" effect, but also decent when killing enemy troops begind defenses. Strength: 20, Class: Mage, Speed: 3
Lion- powerful warrior that can one-hit ogres and hobgoblins, but whose fallacy is slow speed. Perfect for defense (except if enemies have strong flyers and mages) or in Zaros Temple if you do not have Icyenes yet. Dangerous in groups, they can usually take out pyrelords in one or few turns. Strength: 40, Class: Warrior, Speed: 4
Unicorn- powerful and long-range skirmish unit, but not recommended against Bandosian campaign battles. Strength: 30, Class: Skirmish, Speed: 8
Centaur- stronger archer than Saradomin ranger, but has strong advantage in speed. Can one-hit mages. Strength: 25, Class: Ranger, Speed: 9
Priest- stronger healer than the monk, but lacks the bone-burying ability; can cast a spiritual barrier that reduces damage to friendly units inside the barrier by 40%. Strength: 20, Class: Healer, Speed: 6
Icyene- very powerful and expensive flyer that can kill almost every unit in one hit, but beware of mages, rangers, and gutsy hobgoblins. Strength: 40, Class: Flyer, Speed: 8
Special Units
Black Guard Dwarves: Used in "Ice Mountain", medium level warrior but slow speed, but useful until inside the dragons' lair. Strength: 20, Speed: 4
Barrow Brothers
- each brother is equiped with a trinket to enhance abilities
Ahrim: 30 strength mage equipped to have a +3 range
Dharok: 40 strength warrior with plate armor (reduces melee damage by 40%)
Guthan: 45 strength warrior with rune armor (reduces all damage by 30%)
Karil: 30 strength ranger with Camouflaged armor (reduces aerial damage by 40%)
Torag: 45 strength warrior with plate armor
Verac: 30 strength warrior with rune armor
Spells/Items
Healing Aura - Heals every unit in a 3 by 3 square by 5 points
Greater Healing Aura - Heals every unit in a 5 by 5 square by 5 points
Chain Rune Armour - equips to one unit; blocks 30% of all damage types
Blessed Rune Armour - upgrade from chain armor to blocking 40% of damage; when used with a spiritual barrier, the unit will receive only 20% of the regular damage
Rejuvenate - allows one unit to move/attack again in the same turn
Granite Armour - protects one unit from two attacks (completely blocks the damage from those attacks); useful for keeping important units and leaders alive, at the price of that unit being unable to move until the armor is destroyed
Ring of Life - gives a unit a second chance of life by respawning it on a village or tower, destroyed after use
Missions
Deus Ex
- Difficulty: 1
- Reward: Paladin
| Starting Units | |
|---|---|
| Player | 1 Icyene (Zilyana), 2 Monks, 7 Paladins |
| Zamorak | 6 Zamorak Rangers, 1 Greater Demon (Zebub), 5 Goblins, 2 Goblin Priests, 1 Necromancer (Incommodo) |
| Opponent's Possible Spawns | |
|---|---|
| Zamorak | None |
In-game description:
The land blessed by my feet when I first walked on Gielinor is now defiled by Zamorak's wretched minions! Free Zilyana and destroy that demon!
Map overview: You start with an Icyene on the South East, surrounded by guards (zamorak rangers). You have two separate armies, both consisting of 3-4 paladins and a monk each, one North in the town-like area with villages and a tower, and the other army being South near the bridge area. Zamorak starts with the leader Greater demon in the North East. He will have two separate (armies of 2-3 goblins and a goblin priest each, their starting position is the same as that of your army). At the South bridge area, Zamorak also has a necromancer who will go East across the bridge to raise skeletons from the pile of bones.
Strategy:
Move the South Eastern army across the bridge to the north. When the greater demon gets close stall and attack him. While doing so move your Icyene East and North (you will get hit once) and make a bee-line to the demon and easily kill it.
Notes:
- It is possible to complete the mission with a perfect score of 1333 in 1 turn and take no damage with rejuvenation. The strategy is as follows: Move the Icyene next to the ranger and kill it. Rejuvenate and attack Zebub. Meanwhile send all your other units as far away as possible so that they cannot be damaged, end turn (and the 1 ranger won't hit icyene through the woods and the others won't hit the other units), then finish Zebub.
The Cost of War
- Difficulty: 1
- Reward: Monk
| Starting Units | |
|---|---|
| Player | 3 Monks, 1 Barbarian Chieftain, 8 Weakened Paladins |
| Bandos | 2 Goblin Priests, 1 Ork, 7 Goblins |
| Opponent's Possible Spawns | |
|---|---|
| Bandos | Goblin, Goblin Priest, Hobgoblin, Barbarian |
In-game description:
Since Zamorak's return, Bandos has opportunistically been driving my people out of their lands. Now with their backs against the coast, he plans to finish them off. We have no choice but to stand and fight!
Map overview: There is the sea at the far West of the the map, dispersion of forests and fragmentation of tracks throughout the map. You start at the West side with a barbarian chieftain near the portal. You have 3 monks who are not far from your portal area. You will have 8 weakened paladins separated throughout the map. Bandos has his portal at the North East corner of the map, his starting units are also spread out, he also has an Ork near his starting portal. There is a town-like area at the South East of the map, with villages and a tower.
Strategy:
DO NOT ATTACK! Your paladins are wounded, move all of them towards your monks, form a big group at the center of the map, near the single village. There is a (4/10 hp) paladin at the far East near the mountains, move him into the mountains so that he can ambush any enemy barbarian who tries to capture the village there. By the time the ork reaches the center, your paladins should be full health. Surround the ork, kill it, and then charge your way to Bandos' portal. Victory is yours.
Notes:
- Each turn Bandos should spawn either 2 goblins or barbarians, he rarely summons hobgoblins. The entire mission is focused on worrying about the single ork.
- Most summoned units can kill one goblin per turn, so use it to power up your units. This works with 10+str of <, =,>,>>. and 20 from << (see main guide, combat effects)
Exodus
- Difficulty: 2
- Reward: Saradomin Ranger
| Starting Units | |
|---|---|
| Player | 8 Paladins, 2 Barbarian Chieftans |
| Elven House (Ally) | 4 Elven Pikeman, 1 Elf Songstress, 2 Elven rangers |
| Zamorak | 4 Zamorak Rangers, 3 Sea Slugs, 3 Zamorak Mages, 4 Skeleton, 1 Necromancer |
| Opponents' Possible Spawns | |
|---|---|
| Zamorak | Werewolf, Barbarian |
In-game description:
The Elves are fleeing West. These are the last! In return for their safe passage they've agreed to train us in archery. Make sure their leader makes it out of there.
Map overview: You start at the North West and South West, a portal for each of the two armies. You have 3 more paladins at the South near the skeletons. Zamorak has 3 sea slugs at the North West in the swamp area, be careful! Zamorak also has rangers and mages as gaurds at the East, on the path of the leader Elf songstress. He also has a necromancer with skeletons at the South. The Elven house start on the isle at the center of the map, they will also have two weakened pikemen at the East near the Zamorak mage and rangers. The Elven house have their exit at the North East corner of the map, but the route before encountering Zamorak gaurds from their starting point to the exit, will be full of forests and swamps. After the that it's a straight track to the exit.
Strategy:
You will need to make 2 armies a north and a south one. The south army: don't waste too much mana over here. you just need to distract the ranger and mage a little bit till the elven rangers can attack it. other than that the south army is quite useless. The north army: Sea slugs.... well start by getting the portal then try to capture 1 building and exterminate the slugs. After that, its an uphill battle. Resources are low so try to take out the mages that will be made. Then cover/ capture that portal and "distract" the mages so the pikemen will kill it. Look below for gold strategy.
Gold Strategy:
You need to have rejuvenate. On the first turn move the north paladin near the portal. Then use rejuvenate to cover the portal. Send your north chieftain to the nearest portal to the right. Do the same as the first strategy for the southern army. On turn 2 move your north chieftain to the closest village to the right. On turn 3 move it closer to portal but still on another village. Your paladin should survive if it doesn't move. On turn 4 cover the portal with your chieftain and capture it. From then on it should be easy.
Notes:
- If you are having problems keeping the Elf Songstress alive, Granite Armour may help. Use it on the Songstress around turn 8 when two ranged enemies are in range to attack her.
Founding Order

- Difficulty: 2
- Reward: White Knight
| Starting Units | |
|---|---|
| Player | 4 Paladins, 1 Monk, 1 Barbarian Chieftain |
| Paladins (Ally) | 6 Paladins |
| Bandos | 15 Goblins, 5 Ogres, 2 Ogresses |
| Opponent's Possible Spawns | |
|---|---|
| Bandos | Goblin, Hobgoblin, Ogre, Ogre shaman (Rare, but if Bandos has 300 or more mana, he will summon it), Barbarian Spear-Woman (Rare) |
In-game description:
I knew humans had the capacity for extraordinary gifts! These Paladins have held out against wave after wave of goblins. Protect them! Out of them I can create something truly great!
Map overview: You start at the West side. The Paladins (ally) start in the center of the map, in their base. There is a portal in their base. Bandos has portals at the North and South, at the East he has a large amount of ogres and goblins, and at the West he has a weaker army of just goblins and a goblin priest. There is a network of tracks that go from the base directly North, South, East and West (its like a cross road). The rest of the base's surrounding is just swamp and dense forests. At the North West corner there are three villages.
Strategy:
First, send a few paladins to kill a few goblins. DO NOT kill the goblins randomly. Check the path so that it does not block the barbarians way. Send the monk to attack the goblin priest. Once SOME goblins are dead, send your barbarian and move nearest to the fort, then cast rejuvenate and move into the fort. your barbarian should be inside the fort by now. Block off the left and right entrances. Slowly build up your army and fight your way to the portals, while leaving some defence for your top exit(this is not needed if there are no more to kill at the top). If you put some rangers behind the Paladins you can assist with the blockade, but make sure Just Spawned Paladins can reach the enemy when their brethren fall.
'Gold Strategy: This requires completion of Brother's Birds, Exodus and Arcanists. Do the same as above. Once your chieftain has captured the portal, capture the tower. DO NOT capture anything else. Leave everything else to normal barbarians. Instead move your chieftain toward the 3 villages in the western corner. Block the northern entrance with an owl as there are no hobgoblins in the area. Use mages and rangers to kill them at will. Also leave mages on left and right sides to help out with killing ogres. Spam rangers once the right and left entrances are clear as mages are too slow (just an opinion). You can switch to white knights once you have captured the 3 villages to the west. You may use monks to heal damaged paladins or white knights. From there it should be easy.
Notes:
- A maximum of five goblins can be killed by the player on the first turn. If you summon rangers then the Ogre shaman will come. Ogre shaman is very rare for Bandos to summon.
- Do not summon units when not needed. If you can save mana then unleash it all at once, you're chances of winning are greatly increased as Bandos will keep summoning even though he doesn't need it
- If any ogres or ogresses manage to go into you're fort, killing them is your top priority. If you leave them inside for more than 3 turns, you lose.
- The Paladins (your ally) may be annoying at times, since they get in the way, block passages, or kill Bandos units at random locations that may hold you up. Try killing the goblins and goblin priest at the start, on your own, before the Paladins do so. Let the Paladins die so that it will be an easier fight between you and Bandos.
Into the Occult

- Difficulty: 2
- Reward: Rejuvenate
| Starting Units | |
|---|---|
| Player | 2 Saradomin Rangers, 1 Barbarian Chieftain |
| Zamorak | Pazuzu (90HP Pyrelord), 2 Gargoyles |
| Opponent's Possible Spawns | |
|---|---|
| Zamorak | Barbarian, Werewolf, Zamorak Ranger, Zamorak Mage, Black Knight. |
In-game description:
Pazuzu, a fiendish lord who lead his winged minions for the hateful Zamorak, has been seen investigating some standing stones here. Make sure he doesn't find whatever he's looking for.
Map overview: You start at the North West corner with you units and portal, and Zamorak starts at the opposite side with his pyrelord (leader) and two gargoyles. The North West side has a stone circle with a dispersion of forests, whilst the South East side there is a dispersion of swamps. The is an uncaptured portal at the North East corner, along with villages that go through the center, and a network of tracks that go North, East and West.
Strategy:
Send all your troops to the east portal use the rangers to take out the gargoyles. Capture the portal. Now you will have to fight back so you can catch the surrounding buildings. Then head south-west and capture those buildings. Finally, just rush the portal then kill Pazuzu. DO NOT attack Pazuzu until you have the other two portals.
Note: Pazuzu will move towards your starting portal and incinerate it after that he will just stay in the little stone circle until he is attacked then he will try and take your other portals
Druid Circle

- Difficulty: 3
- Reward: Chain Rune Armour
| Starting Units | |
|---|---|
| Player | 2 Paladins, 1 Barbarian Chieftain |
| Druids | 3 Druids, 3 Wolves |
| Opponent's Possible Spawns | |
|---|---|
| Druids | Barbarians, Wolves, Druids, Mounted Terrorbird, Gnomecopter |
In-game description:
I don't know who these druids are or who this Guthix is they talk about. Who knows, maybe he is another God like Zaros who couldn't hold onto his power. Whoever he is, his followers can't stand in the way of Order!
Strategy:
Capture surrounding buildings and send your fighting troops to the northern woods and kill the wolves and druids when they come through. Make 1-2 rangers to take out any possible enemies gnomecopters. Now make an army and head though the north woods to the villages there. At the same time, defend the eastern entrance after you capture the northern villages and head east-ward with your army. Make an army at the eastern entrance and go east to capture the villages. Then, head north-ward for the portal.
or
Send your barbarian to the bottom left village. Use all of your mana on paladins. In a few turns they will spam wolves. To counter, spam paladins. After the first wave is defeated,(Just kill their druids then they will retreat) spawn paladins(rangers if possible,but keep a few paladins) to prepare for the next wave. Slowly build your army until you have 6-8 paladins, 1 barbarian and 2 rangers to counter Gnomecopters. Fight your way through until you reach the portal then capture it. (If you have all the villages at your portal, you won't need to capture anymore as you will be taking 200-250 mana per turn. This is enough to build your army but you can still capture the villages if you want. When you get near the portal, Guthix will send out Gnomecopters. Use your paladins as decoys then kill them with your rangers.
Draynor Hill
- Difficulty: 3
- Reward: Granite Armour
| Starting Units | |
|---|---|
| Player | 1 Monk, 2 Paladins, 1 Barbarian Chieftain |
| Bandos | 2 Cyclopes, 2 Ogre Shamans, 2 Ogres, 1 Goblin Priest, 3 Goblins |
| Opponent's Possible Spawns | |
|---|---|
| Bandos | Goblins, Ogres, Shamans, Goblin Priests, Hobgoblins, Barbarians, Barbarian Spear Women, Cyclopes |
In-game description:
Some Ogres have been seen in this area. Who knows what these useless creatures are up to? Get rid of them.
Strategy:
Send your Chieftain across the bridge to capture the 3 villages there, making sure to stay out of range of the Guards (Cyclops and Ogre Shaman), the Rejuvenate ability could be used to speed him up in the first turn. Meanwhile, send the Paladins and Monk eastward to deal with enemies coming from that direction. Also make a barbarian to capture the east villages. Next, create a blockade at the mountain pass near your portal; A Paladin will suffice, but you may want a Ranger and/or a Knight too. Once you are ready, eliminate the northern Cyclops and Shaman. To do this, you can send a Paladin into range of the cyclops, but stay out of its paralyzing range. Have some Rangers ready to ambush the Cyclops when it attacks the Paladin, after which the Shaman can be beaten easily. You will now be able to take the northern route to the enemy portal. Make an army and rush the portal to win.
Notes:
- The blockade you made should be kept up for the ENTIRE mission. Also, this mission can be completed without Rangers, but this will be more difficult, and result in a lower score. You can win the mission even without killing the cyclops as long as a barbarian takes over Bandos's portal.
- Also, you can use a barbarian or another low-cost unit to draw out a guard to block the path. A guard will not move on its own unless attacked.
Port Sarim
- Difficulty: 3
- Reward: Ring of Life
| Starting Units | |
|---|---|
| Player | 3 Paladins, 2 Monks, 1 Barbarian Chieftan |
| Menaphites | 3 Locusts, 1 Elemental of Elidnis |
| Opponent's Possible Spawns | |
|---|---|
| Menaphites | Locusts, Barbarians, Crocodiles, Mummies |
In-game description:
While you have been distracted with Bandos and Zamorak, some members of the Menaphite pantheon have made a move to outflank us!
Strategy:
On the first turn, try to get level 2 favour as cheap as possible. Never worry about the Elemental of Elidnis, because it is heading towards the tower, and will not move unless attacked. Once the Menaphite Pantheon ended it's turn, then summon some rangers to take care of the Locusts coming from the east. Without ending your turn, capture all the structures with your Barbarian Chieftain. By then, you should have a couple paladins, 2 monks, a barbarian Chieftain and a ranger. Then summon another ranger, and head to the Portal near the water. Your enemy might spawn a few mummies, but if you summoned enough white knights, you could take it out with almost no effort. By then, the Menaphite should have captured the other portal north of your ocean portal. Capture the lone village and keep on summoning rangers and knights. Once you have a small army, rush towards the portal, and it should be easy in all but 5 turns.
Notes: This level is harder without White Knights, but you can use paldins instead. Also, if you have Rejuvenate (from Into The Occult), you can use the Paladin closest to your portal to eliminate any barbs heading for the free portal; move it towards the tower, use Rejuvenate, and move it more towards the free portal. It will not be in range of the Elemental, and will reach the portal before the barb can capture it. Then leave it there to take out any other barbs. Do not move close to the active Menaphite portal, or a Locust will be summoned to remove the Paladin.
Ice Mountain

- Difficulty: 3
- Reward: +5% Mana per turn
| Starting Units | |
|---|---|
| Player | 3 Black guard dwarves |
| Dragons | 3 Blue dragons |
| Zamorak | None |
| Opponents' Possible Spawns | |
|---|---|
| Dragons | None |
| Zamorak | Black knight, zamorak mage, barbarian, zamorak ranger, werewolf |
In-game description: There is a valuable mine in the south of this region, but Zamorak's Black Knights have set up base to the north of Lassar. Raze it to the ground!
Strategy: First push the dwarfs towards the dragons to kill them, this lures the dragons farther up, away from you. Next make two barbarians, send one to the northeastern village, and send one to the south western village. IMPORTANT: STAY OUT OF THE DRAGONS REACH. Meaning always make sure your characters are never lines up with the side of the box, always make it so that the dragons would have to move twice to hit you, otherwise they WILL attack your men. Next make a monk and bring him as close as he possibly can. Next turn move your barbarians that are going to capture the houses again (Keep them from the dragons reach). Make a Ranger and Barabarian and move them close to the monk (Keep these also from the dragons reach). Typically the dragons will slowly inch towards Zamorak's men, every time they do, move up. Don't take the house by the mountain range yet. Now after this, the game may go differently. You may have to play it a couple times, just move carefully away from the dragons and make to the portal, don't stop till your barbarian takes it.
Notes: For the achievement, Run, Dwarves, Escape!, you need rejuvenate and ring of life.
Barbarism Starts at Home
- Difficulty: 3
- Reward: Barbarian Spearwoman
| Starting Units | |
|---|---|
| Player | 1 White Knight, 1 Saradomin Ranger, 2 Paladins, 1 Monk, 1 Barbarian Chieftain |
| Zamorak | Pazuzu (70HP Pyrelord), The Chief (30HP barbarian), 2 Barbarian Spear Women, 2 Gargoyles |
| Opponent's Possible Spawns | |
|---|---|
| Zamorak | Zamorak Rangers, Werewolves, Gargoyles, Black Knights, Barbarians |
In-game description:
Pazuzu has fled to this barbarian village! We can not allow that fiend to build a base at this vital crossing of the river Lum. Strike while he's still on the back foot and drive him back further!
Strategy:
A very easy way to beat this level is by rushing at Pazuzu. First, make the left paladin attack him. Then make the ranger attack Pazuzu and use rejuvenate on her to attack again. Then move the barbarian on one of the houses, and make the monk, paladin and white knight go as close as possible. After this, create 2 more paladins and send them as close to Pazuzu as possible. End turn. After this, make all units that are within range fire on Pazuzu, the ranger being the last. Use a ring of life on her for safety. Make sure all of the allies are outside of the range of the Gargoyles and Barbarian Spearwomen. End turn. Attack Pazuzu again with everything you got, and he should die.
Brothers - Valley of Death
- Difficulty: 3
- Reward: Blessed Rune Armour
| Starting Units | |
|---|---|
| Player | Guthan, Torag, 1 Monk, 2 Paladins, 1 Barbarian Chieftain |
| Zamorak | 2 Necromancers, 1 Hellhound, 1 Zamorak Ranger, 1 Black Knight |
| Opponent's Possible Spawns | |
|---|---|
| Zamorak | Gargoyle (rare), Black Knight, Zamorak Mage, Zamorak Ranger, Werewolf, Hellhound, Barbarians |
In-game description:
Guthan and Torag approach a dangerous region. Conquer it so they may reach our main force.
Strategy:
Take your army to the interjections and clump together. Last a "wave" then head for the nearest portal. Be careful for he will make a mage and head for Torag. Then just take Guthan to kill the mage. Capture the portal then spam rangers and head north-east ward. Send a barbarian to the house cluster so the comp can't make a mage a turn. Once you take its mana it should be easy. Another strategy: (note this is not a step by step guide) Move all of your starting units towards the first portal. Keep your barbarian chieftan out of range of anything at all times, if you accidentally move it into reach, kill the unit that can kill it with Torag or Guthan. Use Torag over Guthan to kill a unit if you have a choice, as Torag doesn't have rune armor to lower damage of all types. Move your units to the portal and keep the monk out of range, but behind Torag and Guthan. Kill the rangers and mages that Zamorak spawns out of portal once you get close. If he spawns a black knight, either kill it with Torag, or trap it with your 2 Saradomin Owls and paladins. If the Zamorak Ranger threatens your barbarian chieftain, move the barbarian out of range and move something to kill the Ranger. Spawn a paladin and kill the barbarian that should come for your first portal. Move either Torag or Guthan on the portal when you clear out the rangers and mages and put the monk next to it. Then move the barbarian to capture portal, and after a few turns he will get there. You should get the portal before a mage comes too close for comfort, but a Zamorak Ranger may come at you with 2-3 werewolves. Use your Ranger that you spawned to take hit any ranger that comes (make sure you hit it before it hits you, or put it out of range and wait for it to move in range then attack it the turn after). After you get the portal slowly move your party forward and keep the barbarian out of harm. Eventually you will be able to make a Saradomin Mage. Spawn one as soon as possible! And move it up to the party. You should eventually get 'stuck' at the bridge. Once you make your way to the bridge move your paladin guarding the portal near your party. Spawn another monk if you lose one. If either Guthan or Torag get hurt, move them near the uncaptured house and make the two monks diagonal from another, and put the brother next to both of them so he gets healed 6 per turn. Get your barbarian chieftain to start capturing the houses. If possible to spare a unit (such as a paladin or so) move it on one of Zamorak's houses to half the mana gain. Use your mage to take care of any thing, and don't be afraid to put it in range of the Zamorak Mage you're hitting. Then use a ranger to attack the same mage, or trap it with paladins. Once you have captured all the houses it should be very easy to win.
Note: Watch your starting portal in case a barbarian comes through the river and threatens your portal. Spawn Saradomin Rangers once you get the houses and can spare the mana and use them to attack over the river once you get close in case you get in an emergency. Two or three of these behind the river attacking on same turn shouldn't be a problem if you have a certain mage that is a problem.
Brothers - Birds
- Difficulty: 3
- Reward: Saradomin Owl
| Starting Units | |
|---|---|
| Player | Karil, Verac, monk, Saradomin ranger, 2 paladins |
| Swamp | 19 Saradomin owls |
| Opponent's Possible Spawns | |
|---|---|
| Swamp | Saradomin Owls |
In-game description:
Karil and Verac have captured a few birds we can train. But first they'll need to make it out of there alive!
Strategy:
You will be swarmed with owls on this level. Try to make the formation of Karil in the front, monk behind Karil, and Verac behind the monk. Have the ranger on one of the sides by the monk. To advance one space each turn, have Karil attack the owl in front of the ranger. Advance the ranger a space, and have the ranger attack the bird in front of Karil. Then advance Karil, the monk, and Verac. Verac will level up immensely during this stage and paladins will most likely die. Gold strategy below.
Move all your paladins further south. DO NOT get your paladins killed. After a couple of turns heal them with greater healing aura to heal them. Whilst doing this, use this following formation. Kill the owl in front of Verac with the ranger and advance Verac a space. Then, move the monk up and make Karil shoot an owl which has the most health so they can't clone while also advancing Karil a space. Attach ring of life to the monk for safety reasons. Also, attach blessed rune armour to one paladin and granite armour to the other. Adding 10% defence to Verac using the rune armour won't make any damage difference. Place them at the portal and do this. This will obstruct some owls' way and attract more attention to the portal. DO NOT use rejuvenate for any of this time. Near the exit, if you encounter an owl always blocking the exit, shoot the owl with the ranger and move verac and the monk into the exit. Move Karil beside the exit and then use rejuvenate. This will make him move into the exit.
Note: Owls use 3 "clone 5" every turn.
Do NOT let the monk die
Army of Darkness
- Difficulty: 3
- Reward: Greater Healing Aura
| Starting Units | |
|---|---|
| Player | 3 Paladins (all below 5 strength), 3 Saradomin Rangers (all below 5 strength) |
| Zemouregal | Zemouregal (30HP Necromancer) |
| Opponent's Possible Spawns | |
|---|---|
| Zemouregal | Has unlimited "Raise Army" which turns all bones in a 3x3 area into skeletons |
In-game description:
Push through this region so we may once again claim Senntisten for Order! No feeble necromancer can stand in our way.
Strategy:
Do not immediately send your starting units to Zemouregal! All of your beginning troops are below 5 strength, so they will not be able to do much damage. The best thing to do is to quickly send a monk or two to rejuvenate the weakened soldiers, because 4 paladins around a monk can take out an almost innumerable amount of the skeletons. Meanwhile, send white knights or unicorns from your portal with some monks towards Zemouregal. They will be boosted as you go along if Zemouregal builds armies near them. Easy gold strategy below.
Move all your units back towards your portal. Avoid bloodshed if possible. Bring out a monk to heal them. Once all inside your walls. Block the entrance with the owl. Increase your favour level till you can spam an Icyene send it towards Zamouregal. Hit him and rejuvenate. Hit him again. You have won the level!
Notes:
- All it takes is just 2 rangers at full health + a rejuvenate to deal 30 HP. If you are lucky enough to not get skeletons near you, it is possible to get a score of 1333.
- To do the gold strategy you need completion of Zaros Temple.
Brothers - Escort
- Difficulty: 4
- Reward: +5% Mana per turn
| Starting Units | |
|---|---|
| Player | Dharok, Ahrim, 2 Saradomin Rangers, 2 Paladins, 2 Barbarian Chieftans |
| Zamorak | 2 Hellhounds, 3 Werewolves, 2 Sea Slugs, 1 Zamorak Mage |
| Opponent's Possible Spawns | |
|---|---|
| Zamorak | Barbarians, Werewolfs, Black knights, Zamorak rangers, Zamorak mages, Hellhounds, Greater demons |
In-game description:
The brave Ahrim and Dharok have found an enemy encampment en-route. Crush the monsters!
Gold Strategy:
Take both portals, move Dharok's army towards the tower, Dharok in front. Don't move Ahrim's troops on the first turn, otherwise a werewolf will come. This way, just a hellhound should come. On the second turn, take the village by Dharok's portal, make sure Dharok stays out of range of mages. Werewolves will go for Dharok, don't worry about them (around turn 3, make a monk to keep him alive). Don't take any villages with Ahrim's barbarian, move your chieftain up the bridge, out of range of the hellhound. Make two barbarians to take the houses. Place one paladin just within the hellhound's range, the other just outside. Move Ahrim northwards. The hellhound will attack the paladin, take it out, first with Ahrim, finishing with a paladin. Move the chieftain up the bridge, use rejuvinate, and move him further. There will probably be a barbarian on the north portal, kill him with your chieftain, then take the portal. Meanwhile, keep Zamorak busy with Dharok's army, reinforcing with rangers as required. The two barbarians at Ahrim's portal should be sent through the mountains west, across the river, to take the villages there. Ahrim's range is massive, you can keep him near the top of the bridge to take out any demons, knights and werewolves approaching. Use the chieftain at the new portal to take the surrounding villages. A ranger and a knight will come in useful to take out anything that gets past Ahrim. As soon as your barbarians take the vilages in the south-west corner, Zamorak can't keep up the flow of werewolves, knights and mages, you should also be able to take both towers with the chieftains. Just move in with your two armies and block the portal. I got 1200+ with this strategy.
Another strategy involve sending your paladins to block the bridge at Ahrim. Swap to white knights when you can but capture your villages first. Use Dharok and his initial forces and capture the tower nearby but spawn a monk to keep Dharok alive. Zamorak will probably take the north eastern portal, don't worry. Send Ahrim's barbarians west to the cluster of houses and take them. With these taken you will be getting considerably more mana and the enemy will be getting a lot less. After you have a sizable army send white knights up to take the northeastern portal. Send Dharok and a small force with him back into the fray and block the other portal. If done right you can win quite quickly
Note: This can be a very hard mission because Zamorak's starting units include melee, range, and magic classes.
Arcanists
- Difficulty: 4
- Reward: Saradomin Mage
| Starting Units | |
|---|---|
| Player | 4 White Knights |
| Druids | 5 Dwarf Cannons, 3 Jade Vines, 2 Mounted Terrorbirds, 2 Gnomecopters, 4 Wolves, 3 Druids, 2 Moss Giant, 2 Void Knights, 1 Black Guard Dwarf, 1 Ent |
| Opponent's Possible Spawns | |
|---|---|
| Druids | Gnomecopter (Rare), Void Knight, Ent (Rare) , Wolf, Druid, Black Guard Dwarf, Battle Tortoise (Rare) |
In-game description:
To truly bring order to Gielinor you will require mastery of the arcane. The druids built a tower for research in this region. Seize it for the forces of Order!
Strategy:
The basic strategy is to keep the jade vine to a manageable size until after you deal with the initial 2 wolves, 2 terrorbirds, and 2 gnomecopters. The jade vine not only prevents monsters from advancing, but it also costs the computer 10 mana per jade vine each turn. When you're ready, try to make waves of knights in the front and rangers in the back to take down the cannons and the other units.It may also be worth while placing a ranger in between the two cannons at the start. Beware of the ent, I couldn't see it in the forest and lost my barbarian to it, costing me more time.
Another strategy:
Keep the jade vine from letting monsters through. Have a few rangers slowly picking off monsters from behind the vines. Spam saradomin owls but keep them OUT OF THE RANGE OF THE CANNONS! Since the cannons are the only monsters that can attack the owls, besides gnomecopters (which they never summon), once you kill them you can decimate the druid's forces using the owls. kill the two at the end of the bridge first, then work your way in. If you can, try to always keep at least 1 owl on the portal. EPIC WIN STRAT!
Gold Strategy: Allow jade vines to grow on either sides of bridge while you march your army single file through center of bridge. Kill cannons first then copters. Use mages to do brunt of work.
Alternative Gold Strategy (1300+): Once you have Icyenes, you can easily get a very high score without much work. Move the first knight between the cannons, use granite or rune armour on him, attack the left one. Move the other white knights and a Paladin into the trees to block the wolves and terrorbirds. Both gnomecopters will come, summon two or three rangers to take care of them. On the second turn, finish off all the terrorbirds and wolves, as well as the right cannon, using rejuvinate on the knight. Keep the rangers you summon out of range of the left cannon. DO NOT KILL THE LEFT CANNON, otherwise the left gnomecopter can attack your knight. On the third turn take out the copters with rangers, finish off the left cannon with the knight. Over the next turns, set yourself up so that you leave one row of jade vines, and put the rangers and the knight to prevent it from growing. Get the rangers to work taking out the forces behind. When you can, summon a mage and put her to work attacking over the rangers and jade vines. Summon a priest when you can, just leave him standing around. As soon as you can, summon an Icyene (summon more when possible to speed things up). Move it over the water, on the right of the bridge, making sure to stay out of the range of the first cannon. Kill the ent, then the two cannons at the back, and finally the bridge cannon. The Icyene can do this without taking damage. Clean up the rest of the field, making sure not to take any damage, stick an Icyene on the portal. You should get a score of 1300 or more.
Opening move: Move the knight that is next to portal between cannons, then summon monk and a ranger. Place ranger next to left cannon and shoot right cannon with ranger and attack right cannon with knight after ranger attack. Use runic armour on ranger if you have it. Then move your east knight as far east as you can into the trees towards the terrors and wolves. Move two west knights south towards cannons but out of range, and place monk in a position that will allow it to attack the right cannon on second move. Second move: Move first ranger directly behind knight that is in between the cannons then summon another ranger and place her behind first ranger so that you are begining to form a line down the center. Kill the right cannon with your monk and then shoot left cannon with second ranger and attack left cannon with the knight that is in the middle of the cannons. Do not kill the left cannon on this move because you will use it to shield your knight from left copter attack. Now move your east knight 1 square south to block terrors/wolfs from advancing onto bridge. They will surround knight, use other knights to kill them. Third move: Use first ranger to hit right copter and summon a barb lady to finish right copter. Hit left copter with second ranger and kill cannon with knight. (Make sure to move monk away from vine so it will spawn another vine and use up more mana) Fourth: After that start spamming mages on fourth and subsequent moves and steadily march your army towards guthix portal, using mages to do most of the damage.
Notes: If you move your three knights east towards terrors on opening move, guthix will send both copters east and above gold strategy will not work. Make use of granite armour once you break through the vines. Occasionally the vines will form a 3 row barrier on guthix's side on the opening move which will slow down breaking through the barrier.
Hold the Line
- Difficulty: 4
- Reward: Priest
| Starting Units | |
|---|---|
| Player | 2 white knights, 2 Saradomin rangers, 2 priests, barbarian chieftain |
| Zamorak | Necromancer, 2 werewolves, Greater Demon |
| Opponent's Possible Spawns | |
|---|---|
| Zamorak | Zamorak Ranger, Barbarian, Werewolf, Zamorak Mage, Black Knight, Hellhound, Gargoyle,
Greater demon |
In-game description:
A strong assault from Zamorak drove us back from Sennisten. In the centuries since, brave priests have been slowing down the flow of Zamorakian troops out of the city. Now their work is nearly done!
Strategy:
Send your chieftain to the close portal and capture it. Then get to the eastern portal near the priests. Watch out for that demon. Use the rangers on it then the knights. In tough times, use the priest to attack. Watch out for the skeletons and the necromancer. Make 1 or 2 paladins to hold him off. Once you get the portal near the priests make another ranger. Fight off the weak werewolf and whatever else that comes. At your home portal, capture some of the buildings around to help. I just sent a white knight to block the portal
Note: The priest's special ability was taken away due to a patch. Previously, they could use the barrier ability like a normal priest. By doing this to both priests, you would not have to worry about protecting them.
Slaughter of the Druids
- Difficulty: 4
- Reward: Lion
| Starting Units | |
|---|---|
| Player | Barbarian Chieftain |
| Druids | 2 Dwarf Cannons, 2 Wolves, 2 Void Knights, 2 Druids, 1 Moss Giant |
| Zamorak | 1 Greater Demon, 1 Zamorak Mage, 1 Barbarian Chieftain, 1 Black Knight |
| Opponents' Possible Spawns | |
|---|---|
| Druids | Barbarians, Druids, Black Dwarf Guards, Void Knights,Terror Birds, Gnomecopters, Moss Giants, Ents |
| Zamorak | Barbarians, Zamorak Mages, Black Knights, Zamorak Rangers, Werewolves, Gargoyles,Pyrelord |
In-game description:
Zamorak is trying to outflank us! His forces have come north from Senntisten and are trying to cut us off. Drive him and the wild druids back!
Strategy:
Build up your army slowly, but quickly enough before Zamorak conquers the Druids. Sending a paladin to kill off the druids' barbarians (at least 3 come down; kill when out of the range of the cannon). Send your chieftain to get the two villages in the northwest corner; Get them and stay unseen. Make a small army of knights, and mages to cross the bridge and IMMEDIATELY take out the cannon. Take the portal (by this time, the druids will be, or should be, on Zamorak's portal) and send your troops to finish off the campaign.
Notes: Surprisingly, within 30 turns, you can get a gold star with at least a score of 1120!
Brothers - Bridge the Lum
- Difficulty: 5
- Reward: Centaur
| Starting Units | |
|---|---|
| Player | Karil, Ahrim, Guthan, Verac, Dharok, Torag |
| Zamorak | 1 Gargoyle, 2 Zamorak mages, 4 Zamorak rangers, 3 Black knights, 3 Werewolves, 2 Greater demons |
| Opponent's Possible Spawns | |
|---|---|
| Zamorak | Werewolves, Mages, Rangers, Black Knights, Gargoyles, Demons |
In-game description:
Now the 6 Brothers are united! Only the Lum is stopping them from marching on Zamorak's forces in Hallowvale. Let's help them towards it, in the name of Order!
Strategy:
First move Guthan and Torag just near the start of the forest and out of the range of the mage, as they will approach next turn. Use either Torag or Guthan (preferably not Guthan, he has anti-mage armor) to kill/wound the knight, use Guthan to kill the werewolf, after moving your max, rejuvenate, and hit the mage, killing it. After that, the 4 villages are yours for a few turns, until they use a Gargoyle. Prepare for it with a Saradomin ranger. Don't send any barbarians yet.
Move Ahrim up to the middle bridge, where he'll be very useful later. Don't use barbarians until the left bridge is clean. Dharok should support the bridge on the right, Verac doesn't matter much yet, move him closer to the center. Karil can flank Dharok on the right bridge to one-hit knight, etc. After Ahrim is met with strong archer support on the center bridge, retreat him and bring up Verac, the slow one. Verac, in addition to your now free Saradomin ranger should hold off the middle bridge until the rangers are dead. The right bridge SHOULD be free within a few turns, so you can withdraw Karil to the center, completing the combat triangle. Within a few turns, you won't even need the brothers. you can choose to either advance them to the portals, or use your now considerable mana count to spam knights and rangers on them. Remember: DO NOT advance them until you have at least 150 mana per turn. You may use barbarians after the left area is completely clear.
After the 8th turn, you may need to deviate from this strategy in order to save one of the brothers. by then you should be about to capture your third village on the left.
Icyenes are very useful on the level.
Also, in the middle there is a road in between two swamps. If you can get a high levelled monster or owl in front of them, and all rangers/mages are out of range, and a melee unit is in front of you, they'll get stuck. Allowing you to build a huge army.
Peddewa

- Difficulty: 5
- Reward: Healing Aura
| Starting Units | |
|---|---|
| Player | Barbarian Chieftain |
| Zaros | 3 Zaros mages, 2 black knights, 6 Zaros rangers |
| Opponent's Possible Spawns | |
|---|---|
| Zaros | Hellhound, Greater Demon, Necromancer, Werewolf, black knight, Zaros ranger, Zaros mage, Gargoyle, Pyrelord, Barbarian |
In-game description:
Humans have an amazing capacity for faith, even in the face of death of their God. Some of the last Zarosian followers have bunkered down in this old fortress. We shall show them the light... by force.
Strategy:
Capture the southern villages and the tower. Send a white knight with rune armor and a mage to deal with the black knights. When they are dead, send your barbarians around the map, seizing the portals. Meanwhile, if you have owls, immediately send one to the southeastern portal and hold onto it so Zaros cannot get another foothold. Keep mages and monks around your starting portal to act as an artillery battery and send back anything that crosses the ice. Send knights and rangers to deal with Zaros' forces, and eventually send him back into the fortress. Icyenes and centaurs do well on this map, as long as the Icyenes avoid the rangers and mages. Centaurs can outrange rangers, so they can one-hit mages and eliminate half the threat.
Notes:
- Try to stay out of the guard ranger's and mage's attack range.
- If you are lucky Zaros will buy a Zaros Ranger on his portal allowing you to capture all the portals and surrounding villages apart from one, but be perpared for several pyrelords to be brought in--mages are the best counters for these.
Flight
- Difficulty: 5
- Reward: Unicorn
| Starting Units | |
|---|---|
| Player | 2 paladins, 3 unicorns, Litara (7HP barbarian spear woman), barbarian chieftain |
| Zamorak | Pazuzu (50HP Pyrelord), Polyphemus (cyclops), 3 zamorak rangers, 3 zamorak mages, black knight |
| Opponent's Possible Spawns | |
|---|---|
| Zamorak | Black Knight, Werewolf, Zamorak Ranger, Zamorak Mage, Hellhound |
In-game description:
Pazuzu is heading back to his fortress near the Unicorn Valley. Litara is our only chance to cut him off! Hurry!
Strategy:
Interestingly, this level is not as hard as it looks. It is, in fact, extremely easy to get gold, so long as you have the correct items. While it is not required, possession of both the Granite armour and the Blessed Rune armour is greatly recommended.
Leave the Paladins and Unicorns where they are, do NOT move them. They can hardly contribute to anything and cause you to take unnecessary damage. First, move your barbarian Chieftain into the village ACROSS THE SHORT BRIDGE next to the tower you possess. Do NOT move the Chieftain onto the village near your portal as doing so will put the Chieftain within range of a Zamorak Ranger guard. Move Litara as far as she will go, staying on the path. Do nothing else and end your turn.
The next turn, move your Barbarian Chieftain onto the unoccupied tower. Again, move Litara as far as she will go, staying in the square of tress. End your turn.
On this turn, leave the Chieftain on the tower. Move Litara onto the path as far as she can go. End your turn.
At this point you may be fretting about why this strategy is letting Zamorak get the unoccupied portal. You need not worry as he cannot bring anything close enough to do any damage before you capture the Temple.
The Barbarian Chieftain should have captured the tower. Move him back onto the tower you possessed from the start. (or anywhere in your "base", keeping in mind the range of the Zamorak Ranger Guards) Again, move Litara up the path as far as she can go. This will put her within range of a Zamorak Mage and a Zamorak Ranger, both guards. Rejuvenate her. CHECK THE RANGE OF THE ZAMORAK GUARD MAGES LOCATED NEAREST TO THE TEMPLE. It is essential you keep out of range of their attacks. Along the two-lane-wide entrance to the area with the temple, Litara should be moved until she is just one square outside the "entrance". For easy reference, check the range of the two Zamorak Mages, moving her until she is just outside their range. End your turn once more.
On the next turn, MOVE LITARA ONTO THE TEMPLE. Then, give her the GRANITE ARMOUR. This will protect her from the first two hits of the Zamorak Guard Mages. End your turn.
On the next turn, check Litara. Depending on each individual game, she may or may not have already lost her granite armour. If she has lost it, give her the Blessed Rune Armour. If she has not, keep the granite armour on her. JUMP THE CAMERA BACK TO YOUR PORTAL. At this point, a Werewolf should have just made it inside your "base". Do NOT be tempted to use a melee unit to deal with him, he is in the range of the Zamorak Guard Rangers. First, summon a Paladin, moving him into the corner of your "base". Do the same with a White Knight. Summon a Saradomin Mage. Move the Mage until you can strike the Werewolf. TAKE NOTE OF THE ZAMORAK GUARD RANGERS' RANGE, DO NOT PLACE YOUR MAGE WITHIN THEIR RANGE UNDER ANY CIRCUMSTANCES. Kill the Werewolf. (Do not be tempted to just kill the Werewolf and kill him outright, doing so may put your Mage within range of the Mages.) End your turn.
The next turn, check Litara. It is greatly likely that her Granite Armour is gone, and she may or may not have suffered some damage. If she has, use Healing Aura or Greater Healing Aura on her, and give her Blessed Rune Armour. CHECK YOUR "BASE" to see if any of your units are within range of any enemy units bearing down on your base. If so, move ALL your units out of harm's way. End your turn.
You should be victorious the next turn.
Notes:
- Beware of the Cyclops when moving Litara. Check it's range as Litara nears it, since a Cyclops can kill Litara in a single hit.
- It is not necessary, but it would be a useful habit to check your "base" every turn and the region around it to see if any units are bearing down on your "base", and if any of your units are within range. This is a useful habit in anomalous games where units reach your base very quickly and can help reduce unnecessary damage.
- A personal best for this is 7 turns taken (as it should be if you follow the above) with 7 damage taken and a final score of 1290.
Zaros Temple
- Difficulty: 5
- Reward: Icyene
| Starting Units | |
|---|---|
| Player | None |
| Bandos | None |
| Menaphites | None |
| Zamorak | None |
| Zaros | None |
| Opponents' Possible Spawns | |
|---|---|
| Bandos | Barbarians, Goblins, Hobgoblins, Ogres, Ogre Shamans, Goblin Priests, Cyclopes, Spear women (rare) |
| Menaphites | Barbarians, Crocodiles, Locusts, Mummies |
| Zamorak | Barbarians, Werewolves, Zamorak Mages, Zamorak Rangers, Black Knights, Greater Demons, Hellhounds |
| Zaros | Barbarians, Werewolves, Necromancers, Zaros mages, Zaros Rangers, Black Knights, Greater Demons, Pyrelords, Hellhounds, Gargogyle (rare) |
In-game description:
An important Zaros temple is located in this region. Zamorak, Bandos and even some Menaphite's are all descending on it to claim the powerful artefacts inside. We must claim the temple for Order!
Strategy:
Send three barbarians to capture the nearby villages. Send at least 2 paladins and eventually a white knight to capture Bandos's portal and tower. Bandos will send barbarians towards the Menaphites. Bandos will send either goblins, a priest, a hobgoblin, or (if you are lucky) an ogre; deal with them. Bandos and the Menaphites will fight; if Bandos wins its easy to rush at his lower portal, then turn and finish him off. If the Menaphites win, be careful: locusts will poison your advancing units. If this is your first time, and you do not have Icyenes, then hurry - Zamorak will eventually fall, and if Zaros can get enough mana, then he will spawn pyrelords towards you. Lions are your best bet: continue to have a good supply of them to your front and you will eventually win. If you have Icyenes, then you can save Zamorak's forces and eventually defeat both groups.
Notes: Zaros prefers to summon lots of necromancers, while in the first 10 turns the bulk of everything summoned are barbarians. Also, just because if you capture a portal, if that deity has even 1 barbarian left, that deity can and will fight. Be careful - you can think once that Zamorak can win, but the hoards of skeletons can easily turn it around (and turn on you)!
Once you capture Menaphite Pantheons portal, there wil usually be lots of bones lying on the ground, just waiting to be reborn as skeletons. A way to get rid of them is monks. Monks bury bones on the tiles they're on, strengthening them. This means that after a while you will get a VERY powerful monk. I got a monk up to 64 strength with this tactic, and it was very useful as bone destroyer, skeleton killer, and healer in one.
Golden Strategy: Send three barbarians to capture the nearby villages and end turn, Bandos should summon 1 goblin and a lot of barbarians on the second turn, if he summons a ogre or worse a hobgoblin restart the level. On the second turn summon a paladin and send him south, if there is a goblin on the way, either kill it or avoid it depending on how much it slows you down. Either give him a rune armour or Rejuvenate him to rush him to the portal. Have your paladin stand on the portal while a barbarian slowly approaches to take it. Be careful though you must do this before bandos captures the tower, if he has the tower then he has enough mana to spawn hobgoblins after the first turn.
Achievements for this campaign
| Image | Achievement name | Requirements | Orb Points | Orb Coins | Members Only? |
| Run, Dwarves, Escape! | Protect the dwarves in Ice Mountain from the wrath of the blue dragons. | 200 | 2 | Yes | |
| Saradomin's Silver | Achieve a silver medal score on all missions in the Saradomin Strikes campaign. | 300 | 3 | Yes | |
| Saradomin's Gold | Achieve a gold medal score on all missions in the Saradomin Strikes campaign. | 500 | 5 | Yes | |
| Peddewa Sieged | Siege and conquer the fortress of Peddewa. | 300 | 3 | Yes | |
| The Brothers March | March the Brothers across the bridge over the Lum. | 300 | 3 | Yes | |
| Zaros Surrounded | Beat the other gods to it and take over the Zaros Temple! | 500 | 5 | Yes |
Trivia
- The campaign name is an obvious reference to the RuneScape spell Saradomin Strike.
- In Deus Ex, the Zamorak team leader is named Zebub. This is most likely a reference to Beelzebub, a demon in Judaism.
- Deus Ex is possibly a reference to the phrase Deus Ex Machina, Latin for "God from the machine."
- Exodus is Latin for "exit", and is a book in the Old Testament.
- Polyphemus, a Cyclops in the mission Flight, is the name of the Cyclops in Homer's Odyssey. Unfortunately, the cyclops in the mission can see and instead makes units quake in fear (unable to move).
- There are blue dragons in the mission Ice Mountain. In the same update that released the Saradomin Strikes campaign, red dragons were changed to blue dragons. Shortly after that they were changed back in to red dragons again, and then back to blue dragons.
- The mission names Arcanists and Hold the Line are references to the games Arcanists and Hold the Line.
- In Into the Occult, Barbarianism Starts at Home, and Flight, the Gargoyle leader Pazuzu is named after the king of demons in Assyrian and Babylonian mythology. It is also the name of Professor Farnsworth's gargoyle in Futurama.
- It seems Ahrim uses the same attack style as Saradomin mages.
- The Icyene unit comes from the Old British "Iceni" tribe, which lived around 2000 years ago.
- The mission name Bararianism Starts At Home is a reference to the song "Barbarism Begins At Home", by British rock band The Smiths.